I was recently contacted by UK-based Terry’s Blinds to share my top 5 design ideas for the fall, and to explain a little about where I draw inspiration for the company’s Designer Insights series. Here’s a peek…

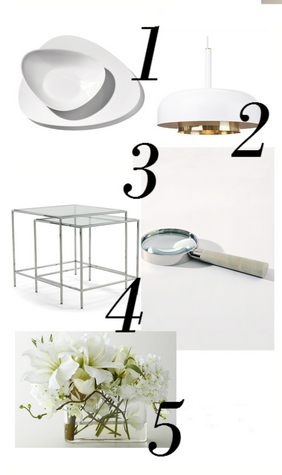
My top five:
1. Ceramics – beautifully crafted, exceptional quality, simple design (e.g., Alessi’s Colombina Collection Table Set)
2. Lighting – glamorous and structured (e.g., Black Rooster Decor’s white glam saucer pendant)
3. Objets that encourage discovery (e.g., Barbara Barry elegant lens)
4. Nesting tables – easy, light, transferable (e.g., Mitchell Gold & Bob William’s Foster nesting tables)
5. Flowers – year round (e.g., beautiful white and green flower arrangements)
You can read the full interview here.