Uptown: The Tronchi Lighting

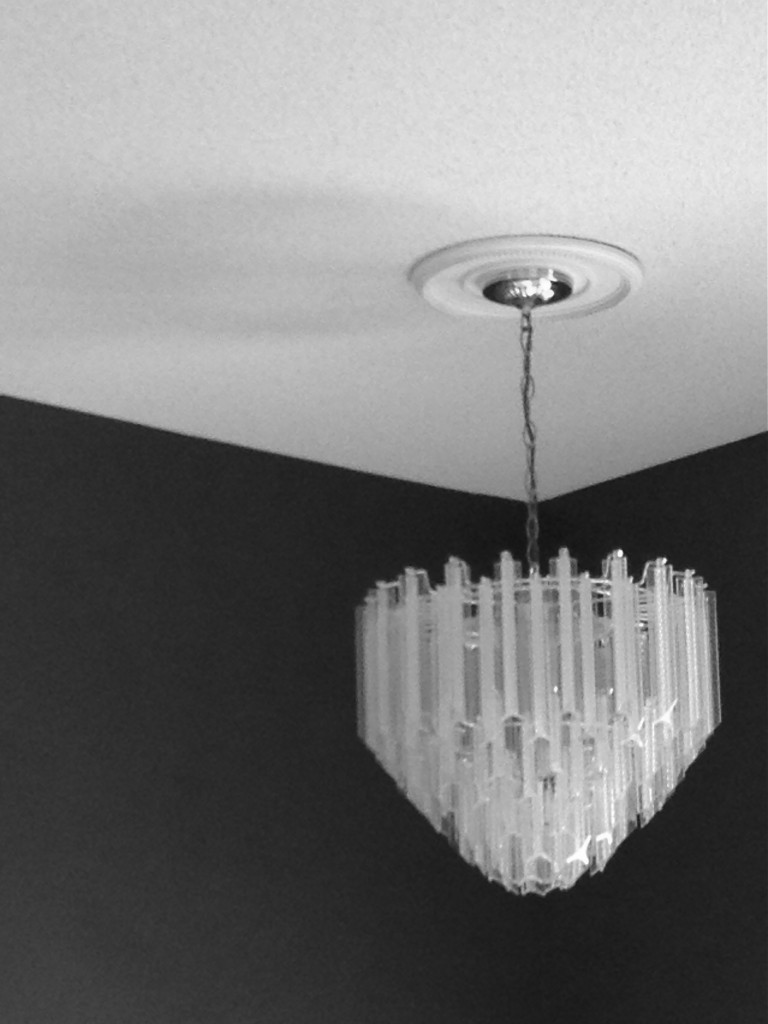
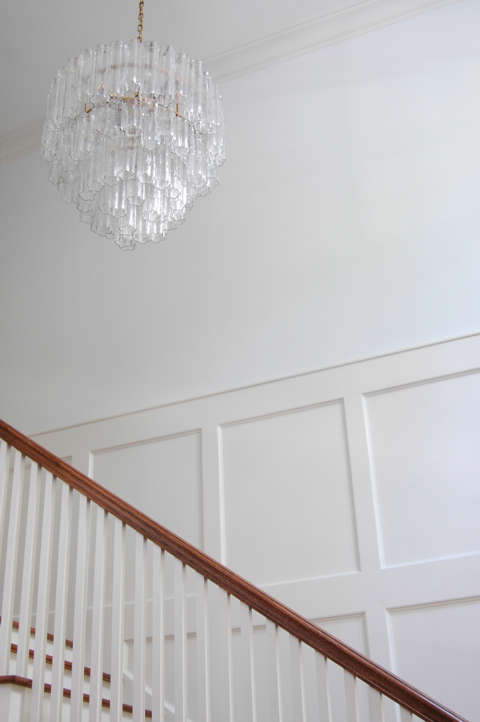
When I bought my house I thought one of the first things to go would be the hall light fixtures. They looked, to me at least, to be too flashy and I couldn’t really imagine how they would match my furniture. The dark burgundy walls didn’t help their case.

White-Cabana-light

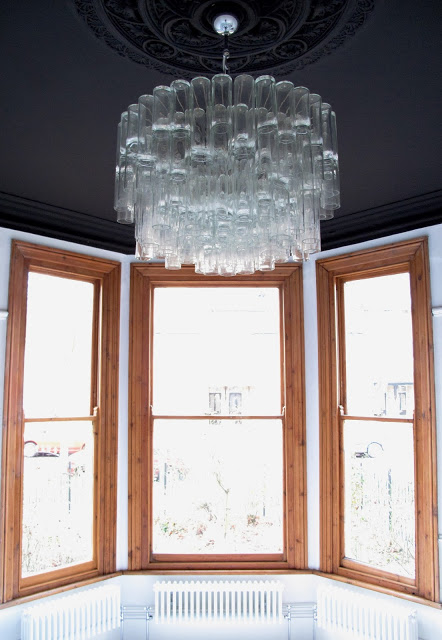
before: the foyer with dark walls and a fancy chandelier

Once I painted the place white, the chandeliers seemed to (almost) disappear. They looked less gawdy than before and they actually began to grow on me. In fact, I’ve become such a fan of them over the last few months that I have now decided to keep them.

And I don’t seem to be alone in my interest in this style of chandelier.

DSC_20812

From the Right Bank

7

47 Park Avenue

$(KGrHqN,!ncFI-+RZoMZBSRjLY2ytg~~60_1

via Ebay

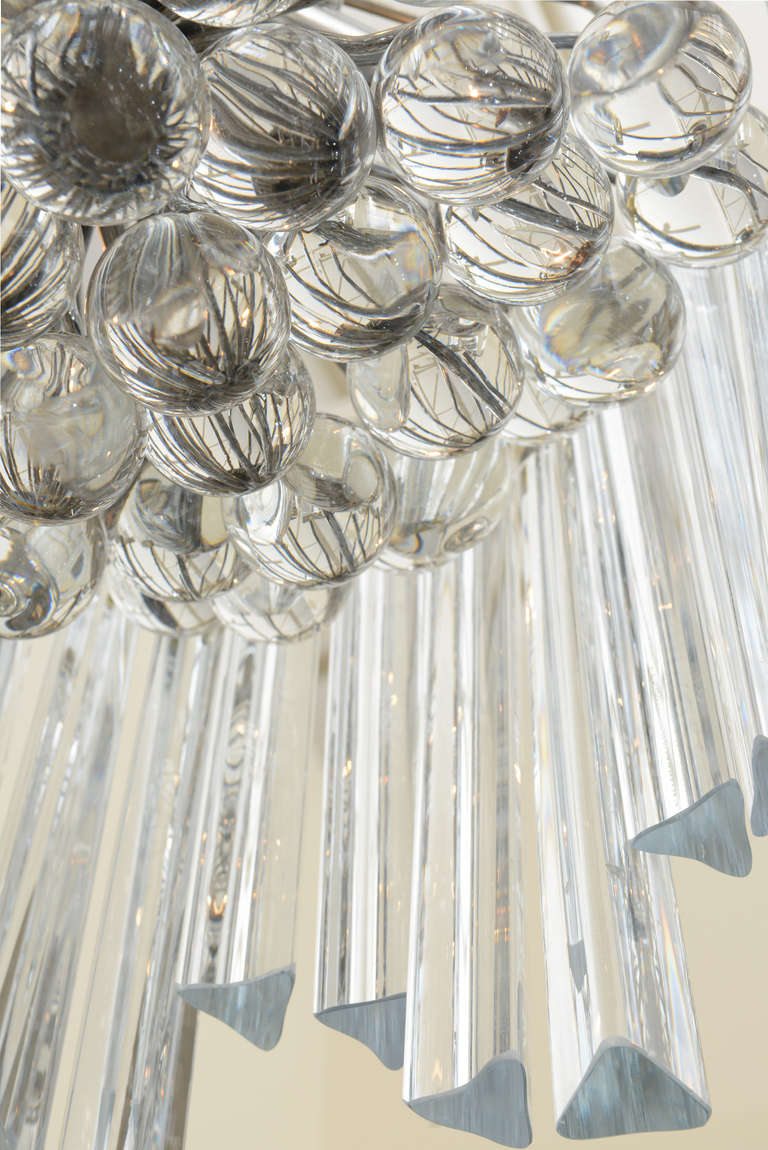
The chandeliers in the above photos are the tronchi style. They’re made of crystal and each piece is in the shape of a tube or trunk (hence the Italian translation of the name). These handmade Murano glass Venini chandeliers can also be made up of prism crystals and balls like the gorgeous fixture from 1st Dibs below.
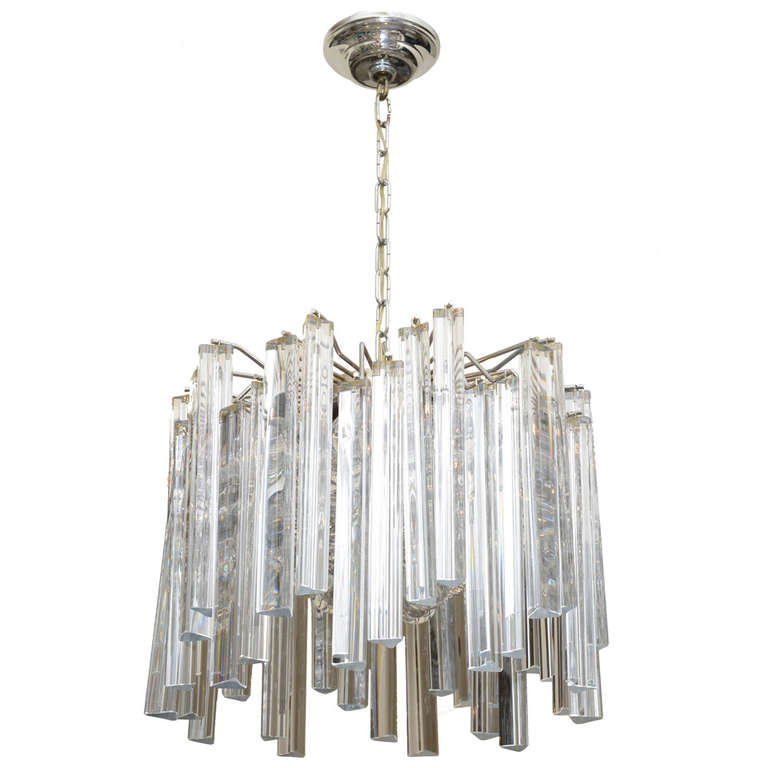
927952_l

chandelier05_l

via 1st Dibs

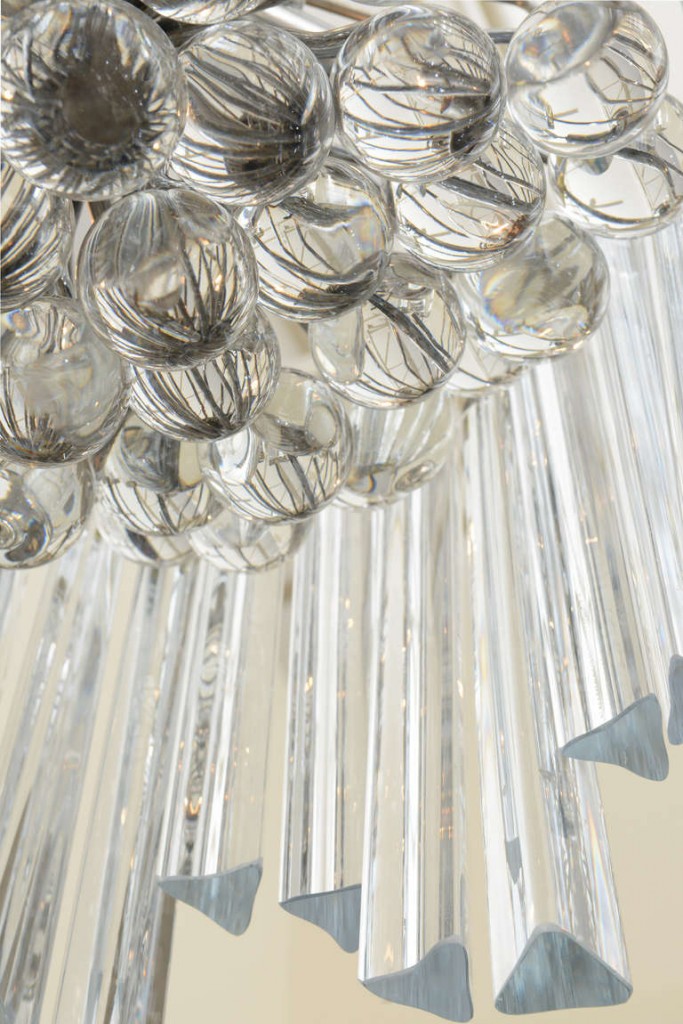
A couple of weeks ago, I found a few similar chandeliers and decided to scoop them up for other places around the house. I’m completely hooked on these now and I have completely embraced their fascinating style! I should say, though, that my collection of lighting fixtures is made up of the budget/imitation version of the Venini glass chandeliers but they still reflect the light beautifully and are interesting to look at (not to mention great conversation pieces). The lucite prisms in my chandelier collection are proving that they work perfectly with my decor. I’ve dropped a few of the prisms as I cleaned them so I’m pretty thankful that the pieces are durable. They’re fairly lightweight too which has made installation smooth. Be on the lookout, people. I have no doubt that we’ll be seeing more of these Venini chandeliers (or the lucite versions) all over the design blogs and magazines soon enough.

Check back soon for a full lighting reveal!

Uptown: Grouting Tiles

I’m pleased to announce that I have now completed the tile work in my powder room. I ordered the grout – smoke grey – from Twin City Tile and grouted the floor over the Thanksgiving long weekend. I am SO incredibly pleased with the floor and I am SO glad I decided to rip out the vinyl.

White-Cabana-powder-room-hex-tile

Grouting was easier than laying the tiles down. I was certainly less stressed about this part of the process. How did I get the job done? I followed the directions on the grout package as well as the instruction I received from the Home Depot tiling workshop I attended and the mini lesson I received from Silvano at Twin City Tile. I mixed the grout powder with water and stirred it all up (with a paint stick – it was a small batch so this was good enough) so it had the consistency of pudding or icing (tiling and grouting is just like icing a cake!). I used the spatula (grout spreader) and moved the grout into the spaces like I’ve seen on TV (honestly!). I let the grout dry for about 10-15 minutes and then spent quite a bit of time (over an hour maybe) cleaning the tiles very carefully. I knew I couldn’t leave any grout residue on the tiles otherwise my floor would be ruined. I spent so much time wiping the grout off with a damp sponge just as I had been taught (one direction, rinse the sponge after each wipe, etc.). It was time consuming but very satisfying. I then let the grout dry for a few days (I think it only needed 24 hours) before I actually stepped on the floor.

The room is almost done. Since the last powder room progress update I bought a new toilet (dual flush – so fancy) and a new mirror. I (and my handy parents) now just need to…

– sand the walls
– prime the walls
– paint the walls
– buy baseboards
– install baseboards
– install vanity (this one)
– install faucet (this one)
– install toilet
– install light fixture
– install mirror (from here)

And then the room will be ready for a big reveal!

Architecture: The Perimeter Institute

IMG_6348

A couple of weeks ago I attended the BrainStem festival at The Perimeter Institute in Waterloo, Ontario. The exhibits were very scientific, techy, and kid-friendly. It was an energetic and very public-friendly event. While the interactive science activities were pretty cool, I was really interested in the self-guided building tour. The Perimeter Institute event coordinators did an excellent job creating a tour that had us walking up and down the stairs and going through all the cool conference rooms.

IMG_6356_2


IMG_6352

IMG_6339

IMG_6297

IMG_6307

IMG_6323

I am so impressed with the architectural gems in Waterloo. The Perimeter Institute and the CIGI Campus are just two of the buildings that have injected vibrancy and innovation into the city.

Photos by Jordana.